
How to Change Your Garage Door Remote Battery
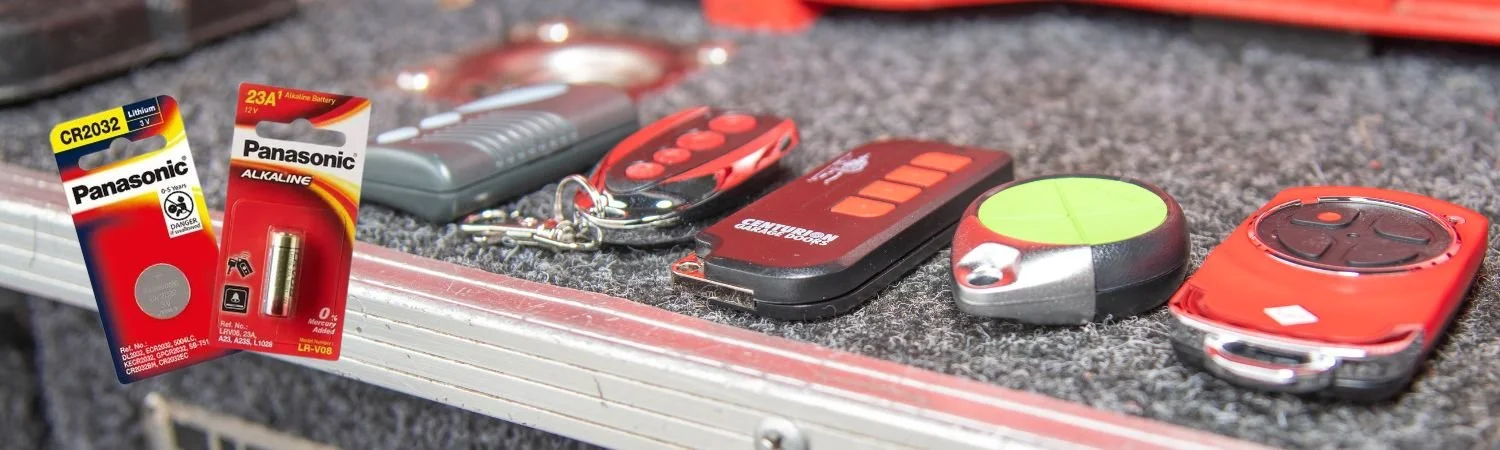
If you’ve searched for “How to Change Your Garage Door Remote Battery” and found this blog post, then you’re in the right place.
This is a simple, step-by-step guide to help you understand when and how to replace your garage door remote battery safely. Whether you use a Merlin, Chamberlain, B&D, or ATA remote, the process is much the same and easy to do at home.
Signs your garage door remote battery needs replacing
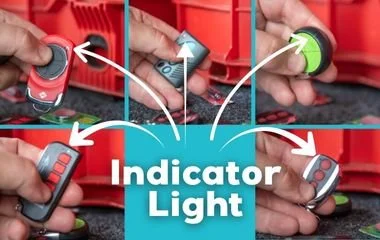
Before you start unscrewing anything, check for these common signs that your remote battery is going flat:
The indicator light doesn’t illuminate when you press a button
Reduced range, meaning you need to stand closer to the garage door for it to work
Intermittent operation where sometimes the door responds, other times it doesn’t
Multiple presses required before the door opens or closes
No response at all, even though the opener and wall button still work
The battery is over 18–24 months old
Replacing the battery early prevents being locked out or stuck inside your garage when it dies completely.
Step 1: Identify the battery type
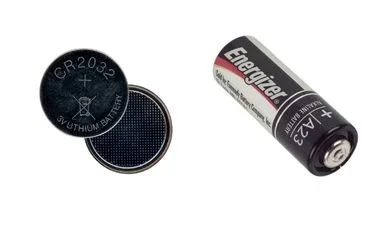
Most garage door remotes in Australia use coin-cell batteries, such as:
CR2032 (used in most Merlin models)
23A (found in some larger remotes)
Check your current battery or the owner’s manual to confirm the correct type. You’ll see the code (for example, CR2032) stamped on the battery itself.
Step 2: Gather your tools
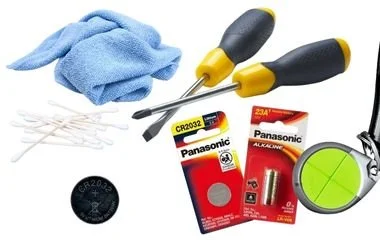
You don’t need much to change the battery. Have these ready:
Small Phillips screwdriver (if your remote has screws)
Plastic pry tool or flat-head screwdriver (for snap-fit cases)
Replacement battery (fresh and not expired)
Clean cloth or cotton swab (for cleaning contacts)
Step 3: How to change your garage door remote battery
Follow these steps carefully to avoid damaging your remote:
1. Open the remote case
Remove screws or gently pry open the casing near the seam using a coin or screwdriver.
Avoid twisting too hard, as plastic clips can break easily.
2. Remove the old battery
Take note of which way the positive (+) and negative (–) sides face.
Lift the battery out carefully using your fingernail or a small screwdriver.
3. Clean the contacts
Dust or corrosion can cause poor connection.
Lightly brush the metal contact points with a clean, dry toothbrush or cloth.
4. Insert the new battery
Slide in the new battery in the same direction as the old one.
Make sure it sits flat and snug against the contacts.
5. Reassemble the remote
Snap the case together or screw it closed.
Press each button to make sure they still move freely.
6. Test the remote
Stand near your garage door and press the open or close button.
If the light comes on and the door moves, you’ve done it correctly.
Step 3.5: Garage door wall remotes
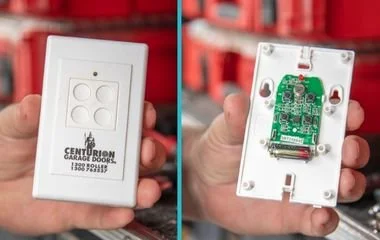
If your garage door has a wall-mounted remote or wall button, it is also powered by a small battery. Many homeowners are surprised to learn that these remotes aren’t hard-wired.
Some models run on coin-cell batteries just like your handheld remote.
Here’s how to check and replace the battery:
Locate the wall remote – usually installed near the internal door to the house or beside the garage entry.
Remove the cover – most models have a small latch or screw at the bottom or side. Use a small screwdriver to gently lift or undo it.
Check the battery type – many wall remotes use a A23 battery or a CR2032 coin cell. The type is printed inside the casing.
Replace the battery – match the positive and negative terminals correctly, then secure the new battery in place.
Reattach the cover and press the button to test. The indicator light should come on and the door should respond normally.
If the wall remote doesn’t work after changing the battery, it may need to be recoded to the opener. Refer to your garage door manual or contact Lancaster Garage Doors for assistance.
Step 4: Troubleshooting
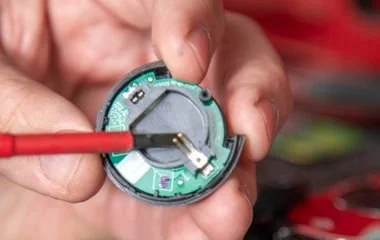
If your garage door still doesn’t respond after replacing the battery, try these checks:
Check battery orientation to ensure the positive side faces the correct direction
Confirm both terminals are touching the battery properly
Inspect the antenna wire to ensure it hangs freely from the opener
Reprogram the remote if it has lost its code (follow your opener’s manual or call us)
Replace the remote if buttons are cracked or unresponsive
Battery safety tips
Keep coin and button batteries out of reach of children, as they can be dangerous if swallowed
Always use genuine, high-quality batteries for reliability and safety
Recycle old batteries at approved drop-off points; never put them in household rubbish
Store spare batteries in a cool, dry place
Safety warning: non-compliant remotes
If your garage door remote is more than two years old, it may not meet Australia’s current button battery safety standards.
Since June 2022, all new products sold in Australia that contain button or coin batteries must comply with mandatory safety requirements under Australian Standard AS/NZS 62368.1. These rules ensure that:
Battery compartments are secure and cannot be opened without a tool
Packaging includes clear safety warnings
Products are tested to reduce the risk of child choking or battery ingestion
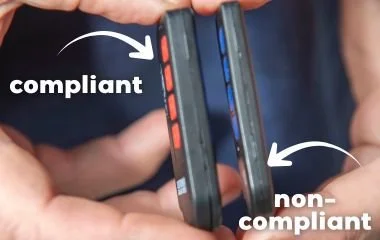
Older remotes, especially those purchased before mid-2022, may not have these safety features. This means the battery compartment could be easier to open, increasing the risk if young children access your keys or remote.
If you have a baby or toddler who likes to play with your keys, we strongly recommend upgrading to a new, compliant remote that meets the current Australian safety standard.
For more information, visit Product Safety Australia – Button Battery Safety.
Best practices for long-term reliability
Replace batteries every one to two years, even if your remote still works
Keep the remote dry and out of direct sunlight
Avoid leaving it in the car during extreme heat
Have your garage door serviced regularly to ensure all components, including remotes and safety beams, work correctly
If you need professional help, Lancaster Garage Doors can check your remotes, reprogram them, or supply new genuine and compatible remotes.
FAQ’s on How to change your garage door romote battery.
-
Most modern remotes, including Merlin models, use a CR2032 lithium coin-cell battery. While older or larger remotes may use A23 batteries.
Always check your existing battery or the label inside your remote to confirm.
-
Typically every 1–2 years. If you notice reduced range, delayed response, or the indicator light no longer working, it’s time to replace it sooner.
-
The remote light doesn’t come on when pressed
You need to be closer than usual for it to work
It only works after several presses
The door opens slowly or intermittently
The remote suddenly stops responding altogether
-
Yes. It’s a quick and easy job. You’ll usually need a small screwdriver and a replacement CR2032 battery. Follow the steps in this guide to open the case, swap the battery, and reassemble safely.
However, if this is just something you can not do, then please contact us so we can help you.
-
Yes, as long as you handle the battery correctly and keep it out of reach of children. Coin batteries can be a choking hazard, so always store and dispose of them safely.
-
Common reasons include incorrect battery orientation, poor contact between the terminals, or a lost code connection to the opener. Check the polarity, clean the contacts, and if needed, reprogram your remote following your opener’s manual.
-
Not usually, but if the remote has been unresponsive for a long time or lost power completely, it may need to be recoded. Follow your garage door opener’s instructions for recoding.
-
Yes, most hardware stores, supermarkets, and service centres carry CR2032 and other common remote batteries. Always buy from a reputable supplier and avoid cheap, unbranded packs.
-
Try these checks:
Make sure the new battery is correctly installed with proper polarity.
Check that the opener’s antenna is hanging down and not damaged.
Reprogram the remote if necessary.
If the remote is old or cracked, it may need replacing.
-
No. While CR2032 is the most common, different models and brands can vary. Always confirm your remote’s specific battery type before purchasing replacements.
-
No. Garage door remotes use disposable lithium or alkaline batteries that cannot be recharged. Always replace them with new ones of the same type.
-
Coin batteries are extremely dangerous if swallowed, particularly for children. They can cause severe internal burns within hours. If you suspect a battery has been swallowed, seek immediate medical help and call the Poisons Information Centre on 13 11 26 in Australia.
-
Since 2022, all garage door remotes sold in Australia must meet mandatory button battery safety standards. Older remotes may not comply and could open easily, posing a choking or ingestion risk for children.
-
Yes, especially if your remote is over two years old and doesn’t meet the latest safety standards. New compliant remotes have secure battery compartments and improved reliability.

Written by Paul Simmons – Owner of Lancaster Garage Doors
Paul is the owner and lead technician at Lancaster Garage Doors, a trusted family business based in Bunbury, Western Australia. With years of hands-on experience, he’s passionate about helping homeowners and property managers keep their garage doors running safely and reliably.
Edited and Published by CLP Advertising & Photography Services